
26th January 2026
Whether you’re working to install new fascia boards for the first time or replacing fascia boards to give your property a vibrant new look, measuring is crucial. Without the correct sizes, you risk a wonky appearance and poor-performing fascia. No one wants damp in their walls! Here’s how to measure fascia boards to ensure they are correct for your project.
Table of contents
What is a fascia board?
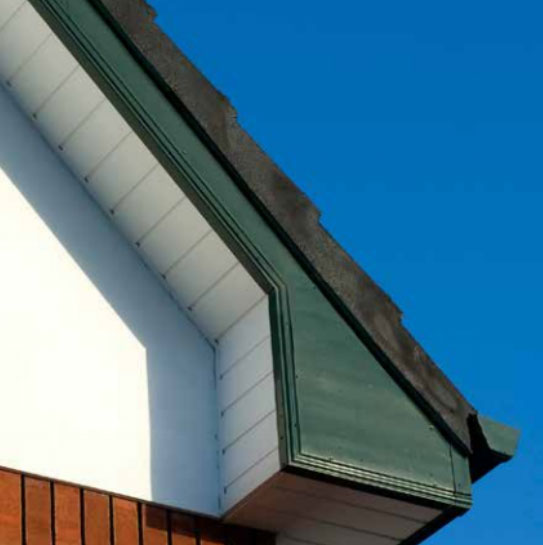
The fascia is the horizontal board (or boards) that run around the edge of the roof of a building. The fascia boards close the gap between the walls and the roof. This is done by the boards hanging over the walls of the building.

How do you measure fascia?
There are measuring methods for installation and for measuring the roof fascia itself.
Measure the fascia board
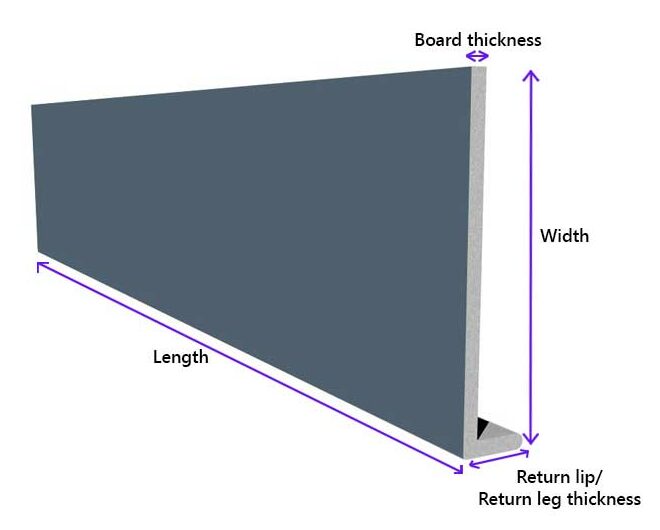
When measuring the fascia board, you should typically measure externally on the board using a tape measure.
- Width = bottom to top.
- Length = across the front of the board.
- Thickness = ends of the board (not including the return lip/return leg).
- Return lip thickness = back of the lip to the front of the board on the ends.
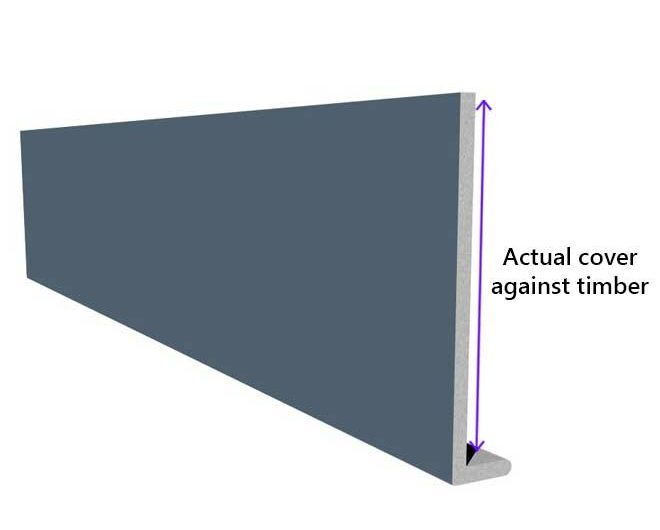
If you are using a cover board, this will cover existing timber. You will need to work out how much of the timber the fascia board will truly cover because of the lip (also known as a return lip or return leg). So, find the width measurement on the interior of the board, starting at the lip at the bottom of the board to the top.
For example, if the width of a board is 200mm, you’ll need to remove at least 10mm from the total measurement of the width. This will give a more accurate measurement of how much timber will be covered. The sum you take away from the width will depend on the thickness of the lip.
A mammoth fascia board, the board that fits directly onto the rafter ends with no timber backing board, is measured the same. Measuring the lip will show you how much groove it has for the soffit to fit into.
Measuring for installation
Working with a partner is advised to help with finding the correct measurements. However, if you are working alone, then follow the guidance below:
Step one
Use something to hold down a single end of the tape measure.
Step two
If you’re planning a complete fascia board installation, measure from the first rafter to the last.
If you’re only installing a section of the fascia board, measure the gap where the new fascia board will be placed.
Step three
Use a carpenter’s square to transfer your measurements onto the length of the fascia board. The square will ensure the line you cut into the fascia board is straight with a perfect 90° angled corner.
That’s all there is to it! You can measure your fascia as desired and get to installation as soon as possible without fuss.
Explore our array of wooden fascia boards, plastic fascia boards and more on our site. Alternatively, find out how you can improve your home’s drainage with guttering and more by exploring our range of Help and Advice. You can also contact our friendly customer service team for help with any enquiries you may have.

Was this guide useful?
Mentioned in this project guide:


