
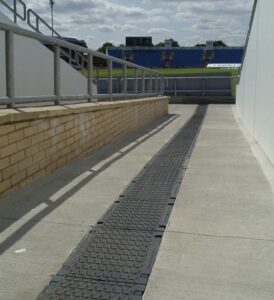
It’s essential to clean your channel drainage so that it helps remove surface water away from gardens, patios, and driveways to prevent flooding or over spilling.
This type of building drainage, also known as trench drainage, effectively controls water flow by reducing pressure on the drainage system. So, to ensure that the system is consistent and efficient, your drain channel must be cleaned on a regular basis, especially during the rainy season when it frequently clogs up. So, how do you unclog a trench drain to ensure it performs efficiently?
Table of contents:
How to clean channel drains
Cleaning your grill drain is quick and easy. All you’ll need to do the job is a few simple tools:
- Screwdriver
- Drainage hook (can be substituted with a sturdy clothes hanger)
- Dustpan & brush
- Bucket
- Trowel
- Hosepipe
Once you’ve assembled everything, you’re ready to go! Simply follow these steps.
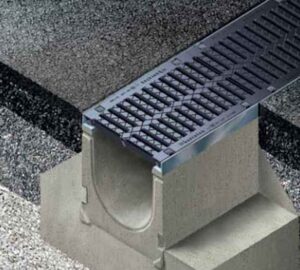
Step 1: Lift off the storm drainage channel cover
This seems simple enough, and depending on the model, it usually is. However, in certain cases, you’re probably wondering, how do I remove a channel drain cover?
Channel drainage solutions often use keys, bolts, screws, or even more complicated locking systems to secure the grate to the channel. If you’re not sure which type yours is, it’s best to refer to the manufacturer. This way, you’ll avoid any unwanted damage.
Once you’ve unlocked the grate successfully, use the drainage hook or hanger to carefully lift the cover from one end. Remove it completely and set it aside.
Keep in mind that these are often quite heavy, so don’t rush it!
Step 2: Clean the body of the channel
Using the trowel, remove any leaves and small twigs that have found their way inside and place them in the bucket. All of this can go into the compost later.
Then, go to work with your trusty brush and dustpan to get rid of finer dust and debris.
Step 3: Clean the sump unit
Most channel drainage solutions feature a sump unit at the end of the channel. Basically, it acts as a filter by stopping any debris from going into the storm drains.
Once you’ve located it, proceed to carefully take out the sump unit. Empty and clean it just like you did the channel body before replacing it.
Step 4: Rinse the channel body
Use your hosepipe to thoroughly rinse the body of the channel and remove any silt.
Pro tip: Don’t use high pressure if your grating is plastic, as you might damage it.
Step 5: Replace the channel cover
Slowly put the grill drain cover back into place, one length at a time. Step on it to apply some pressure and allow it to snap firmly into place.
Finally, lock the channel.
Voila! Your channel drainage is back in business.
How does a clean channel drain work?
We have a handy guide for how channel drainage functions when clean and free from debris.
Though channel drainage is easy to maintain and has a long service life, sometimes drainage channels require replacement. So if that’s the case, make sure to know how to select the right channel drain for an informed purchasing decision.

Was this guide useful?
Mentioned in this project guide:


