Black spots on the wall, an unpleasant smell and a cold, clammy feel in certain areas of the house? You may be experiencing an issue with damp. This unattractive and unwanted problem can take shape in all manner of ways so it’s worth investigating to get a hold of the scale and causes before you tackle it.
Wet patches and black mould don’t just look unsightly, damp can decay plaster, rot through masonry and deteriorate timber, not to mention cause a serious health hazard for you and your family. The longer you leave damp to its own devices, the more damage it can do to your property – and the more expensive it can be to treat. A damp patch on your wall, ceiling or skirting board means one simple thing: excess moisture has penetrated the fabric of your home.
Don’t know your damp proof membrane from your injection cream?
That’s where this buyer’s guide comes in.
At Roofing Superstore, we’ll teach you how to identify the sources of damp in your home, recommend ways you can treat them and talk you through all the various damp proofing products we offer.
Table of contents:
Condensation
Condensation is the most common cause of damp in the home. It happens when warm, moist air hits a cold surface in your home. This is usually walls and windows, but really it could be any surface with a temperature that’s below the so-called ‘dew point’ – the point at which saturated air releases its water vapour.
What causes condensation?
Our modern lifestyles have a lot to answer for! Although it’s hard to believe, one person alone can generate four pints of water vapour per day through washing, cooking and plain old breathing. Now imagine filling up four pint glasses with water and throwing them directly onto your walls and windows and you’ll get an idea of why condensation can become such a huge problem.
But not only do we generate huge quantities of moisture from things like drying our washing indoors, but we’re also so anxious not to lose any expensive heat that we’ve practically sealed our homes shut, with triple glazed windows and layers of insulation that reduce a building’s ability to ‘breathe’. This only increases humidity and provides little ventilation. Other home improvement measures can reduce airflow too, such as tightly fitted laminate flooring and the removal of existing chimneys without adding extra ventilation measures.
How can I tell if I’ve got damp caused by condensation?
These are the telltale signs of condensation damp:
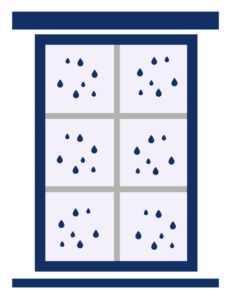
- Commonly found in bedrooms, bathrooms and kitchens
- Black spots of mould around windows and on walls
- A musty damp smell
- Steamed-up windows
- Puddles on window sills
- Mould on window seals
- Damp patches on internal walls
- Wallpaper that peels off the wall
How should I treat condensation?
You’ll need to attack your condensation damp problem on three fronts: ventilation, heating and lifestyle.

When it comes to condensation, good ventilation is vital. Letting air flow around your home allows water vapour to circulate and escape. Sometimes simple measures such as opening a window after a shower go a long way. Think about installing vents or extractor fans in bathrooms and kitchens and use porous paints when decorating to allow walls to breathe. You could also consider installing a good home ventilation system. These are designed to give you a continuous flow, that exchanges humid air with fresh, something which can really stop mould growth.
Next, you’ll need to look at your home heating. The best way to keep your home condensation-free is to keep it consistently warm on low heat, avoiding any big swings between cold and hot, to stop water vapour from evaporating and condensing each time there’s a temperature change. Increasing the amount of insulation can also help to keep your home at this desired, constant temperature. Cavity wall insulation can reduce the number of cold spots on your walls while having double glazing fitted (along with air vents!) can raise the temperature of your windows above the dew point.
Changing some lifestyle factors can also be a big help in reducing the amount of moisture in the air. Dry clothes outside when possible, or in a room with a dehumidifier (or even a window left open if it’s safe). Put lids on saucepans while cooking, and close internal doors when showering to stop moist air from travelling around the house. You could even look at where you’ve placed your furniture. Try not to put large objects like wardrobes and sofas up against external walls, but if that’s not possible make sure there’s a large enough gap so that air can flow.

Are there any DIY solutions for condensation damp?
Once you’ve tried all the suggestions above, you could buy damp proof paint from any DIY store. This will not only cover any black mould patches or stains, but it will also offer further protection to stop damp from returning.
Penetrating damp
A common problem in older properties that are more exposed to the elements, is you have penetrating damp when water is able to get into your home from the outdoors. This kind of damp is potentially the most serious as it can really damage your home’s structure without you realising it. The water that seeps in may even contain salts or other pollutants which can further damage render, timber and plaster, so it should never be ignored.

What causes penetrating damp?
There could be several causes of penetrating damp, including:
Building faults

The most common cause of penetrating damp, building faults include holes in the roof, defective flashings, missing roof tiles, wall cracks or air gaps around windows and doors, all of which allow rain to infiltrate. Problems with your pointing, render or cladding can also be to blame, as can porous bricks – where ageing, crumbling brickwork has lost its ability to keep out the rain.
Guttering faults

Poorly maintained rainwater fittings may mean excess water pouring down outside walls, increasing the chance of damp getting in. Broken downpipes or blocked gutters can cause continual wetting of just one point in a wall, which over time can cause significant damage.
Internal leaks

Big leaks are easy to spot and sort out. It’s the slow drip, drip, drip of small leaks from faulty appliances, damaged pipes and bad tiling that can cause major damp problems over time. Common offenders include damaged seals around showers and baths or broken dishwashers and washing machines. Even the tiniest of leaks can lead to wet rot that’s often now spotted until the ceiling of the room below gets watermarked.
How can I tell if I’ve got penetrating damp?
These are the telltale signs of penetrating damp:
- Wet, leaking walls
- Peeling paintwork on exterior walls
- Plaster that feels wet and crumbly
- Sporadic blotchy patches that get worse when it rains
- Dark stains on the ceiling
- Unexplained large water bills (from leaking pipes)
- Green mould on external walls
- White salt marks and tide marks
Are there any DIY solutions for penetrating damp?
There are lots you can do to keep your home free from penetrating damp – it just depends on where the problem lies. While some jobs such as tile waterproofing or re-sealing showers or baths are easy to do yourself others, such as roofing require working at a height and as such, they may be best left to the experts.
In the bathroom

If your penetrating damp is in the bathroom, consider products that help you waterproof the tiles – as most leakage occurs behind bathroom tiles. The Aquaseal range from Everbuild can give you a simple but effective paint-on solution that completely waterproofs shower rooms, bathrooms and wet rooms and can be tiled over after 24 hours of drying time.
Or eliminate the need for tiles altogether with bathroom wall panels. Available in wide sizes, these are great for a quick solution, as you only need two panels to fully waterproof a single shower unit. Great for peace of mind, they’re also good if tiling’s not your strong point as they don’t need grouting, are easy to wipe clean and can even be fitted over any existing tiling you have.
In the walls
 Another common cause of penetrating damp is ageing external bricks – where brickwork has become porous and is allowing water into your home. If that’s the case, painting bricks with an exterior water-repellent fluid can seal your walls again while still allowing them to breathe. Repointing repair solution can also be a good preventative measure creating an invisible layer that protects against wind-driven rain or surface moisture but still allows your home to breathe.
Or, if your penetrating damp is caused by a hole in the wall letting in rainwater, look out for a water stop product. These products contain different compounds that instantly expand and form an instant watertight seal in concrete and masonry. Occasionally, the cause could be problems within your cavity walls. Clearing debris from within the cavity can help, as can installing a damp proof membrane behind the plaster.
In a roof
If damp patches appear on the ceiling after a heavy shower, you may have a damaged or missing roof tile that needs replacing. With a flat roof, leaks and excess moisture can be a real problem. But you’ll need to stay on top of it as the water has nowhere to go but straight down, into the ceiling below.

Rising damp
Believe it or not, rising damp is a hotly disputed topic! Specialist companies would have you believe that rising damp is commonplace, while some people dispute its existence at all. The reality is probably somewhere in the middle – when it comes to moisture in the home, penetrating damp and condensation are more common.
Rising damp is quite hard to spot – in fact, you may smell it before you see it, because much of the damage is taking place out of sight below floor level. You may only notice it once it starts to creep up walls and skirting boards. But whatever you do, don’t ignore it because it can damage brick, concrete and timber, and lead to wet and dry rot.
Rising damp can affect both internal and external walls. Plus, the water that rises from the ground may also contain salts which are left on the walls once the water evaporates. The salts can make paint bubble and leave a white deposit behind which not only looks unsightly but attracts even more damp and moisture.
What causes rising damp?

Rising damp occurs when the natural groundwater that surrounds a property rises up through dry masonry. Moisture gets sucked up from the ground through the capillaries in brickwork, a bit like water being sucked up through a straw. How high the damp will rise depends on the state of your masonry – if it has lots of fine pores, the water will be able to rise higher – even up to around 1.5 metres in some cases.
This process is usually prevented by a damp proof course (also known as a DPC) in the foundations. When people talk about a damp proof course, they mean a layer of waterproof material in the wall of a building near the ground. This could be a layer of damp proof cream that’s injected directly into the walls through the drilling of small holes. Or it could be a damp proof membrane that’s laid underneath new floors.
But no matter what kind of damp proof course your home has, it’s worth remembering that these can sometimes break down and fail, letting moisture through again.
Are there any DIY solutions for rising damp?
There are several things you could do to treat rising damp, but always call in the experts if you’re not sure. You can try damp proof injection cream, damp proof membranes or tanking solutions.
Damp proof injection cream

Damp proof injection cream is injected directly into a wall after all the plaster (and any wallpaper) has been removed. The cream is injected into small holes drilled in the wall – these are carefully positioned in the mortar course. From here, the cream turns into a liquid that penetrates the bricks. The resin inside the cream is activated when it reaches the mortar then, as it cures, it creates a water-repellant pore liner that prevents moisture from rising above a certain level.
Injection creams are both effective and economical and you can choose between complete kits or individual cartridges.
Damp proof membranes
Damp proof membranes can be used on walls to treat penetrating damp, as we’ve mentioned above. But they can also be used on the ground under a concrete slab to prevent rising damp. If you just have a small amount of rising damp, you may be able to apply a few coats of liquid emulsion damp proof membrane underneath your floor covering. But if the damp is extensive, you’ll need to use damp proof sheets made of durable polythene. These come in all shapes and sizes, from maxi rolls to mini packs.
Tanking solutions

Tanking a wall or floor (or a whole room if it’s below-ground level) means sealing it to protect it from moisture. This is usually done to protect areas that are already quite damp and are prone to mould or feel incredibly cold. Tanking membrane comes in sheet form and consists of plastic that’s studded to allow the air to flow. The sheets are fixed to the walls with plugs and sealed with tape. Tanking slurry is easy to apply both inside and out. It’s attracted to the water on the walls and chemically bonds with damp brickwork to form a waterproof layer.
Can I treat damp myself?
Finding, identifying and treating damp can feel complicated, but there are so many things you can do to solve the problem yourself. While rising damp is more tricky to get rid of, it is thankfully quite rare and, when it comes to penetrating damp or condensation, there are several things you can do yourself, for free. For example, clearing your gutters, opening more windows and stopping drying indoors are all effective methods to keep your home free from moisture.
Even DIY methods of waterproofing such as using tanking slurry in basements or water stop products on external render are really quick and easy to apply – some you just have to paint on. But whatever you do, make sure you deal with damp as soon as you spot it because a little moisture can wreak havoc with the fabric of your property.
Could I deal with mould just by cleaning or painting over the black marks?

Black, spotty mould on your pristine, painted walls is no one’s idea of a good look. But as tempting as it may be to just remove them with a mould remover and a quick wipe with a damp cloth, do that and you’ll only be masking a problem that will steadily be getting worse behind the scenes. Left to its own devices, excess moisture can seep into brick, plaster and wood. So forget about applying a fresh coat of paint until you’ve dealt with the problem of excess moisture at its source – and we’ll explain how.
What if I’m unsure of how to treat damp or whether my chosen treatment would work?
If in doubt, call a professional. Treating a small damp problem yourself may seem like an effective and penny-pinching option but if it’s treated incorrectly or the fix only lasts a short while, you’ll need to spend a lot of money putting right structural problems.
It could be tempting to action a short-term fix too if you’re looking to sell a property but damp issues may show on conveyancing or may cause larger structural issues which will show on inspection too.
Was this guide useful?
Mentioned in this product guide:


